你好,我是杨文坚。
上节课,我们学习了单元测试,也收尾了基础组件库相关开发。从今天开始,我们会正式围绕着课程的最终实战项目——运营搭建平台,打造相关的Vue.js业务组件和业务功能。
运营搭建平台,核心是搭建功能,“核心业务”就是提供搭建页面的能力。那这节课,我们就围绕着这个搭建页面的“核心业务”来打造业务组件,搭建页面需要用到拖拽布局组件。
可能你会问,为什么要把拖拽组件划分成业务组件?拖拽功能也很基础,为什么不划分成基础组件呢?
这是因为,拖拽功能,虽然基础,但很难做到通用,不同场景下拖拽的需求效果是不一样的。比如,是实现布局弹性排序?还是让布局直接调整位置?还是把组件从一个布局容器拖到另外一个布局容器里?当然,不同的开发团队,组件规范定义有一定差异,不过,这些功能实现,跟业务需求特点息息相关,很难做到一个组件兼顾所有拖拽功能。
那如何搭建拖拽布局组件呢?我们开始今天的学习。
为什么需要拖拽布局组件?
搭建页面,原理就是通过配置数据,来驱动页面渲染对应内容,数据描述的是目标页面的布局情况,例如页面有多少个区块、每个区块里有多少个子区块,描述布局的数据也包含了每个区块里要渲染什么组件。
这就意味着,使用者只要能控制数据就行了。所以,实际上,即使没有拖拽布局组件,我们也是能实现运营搭建页面的基本操作功能。
但是,并不是所有项目的使用者都是前端开发程序员,也并不是所有项目的使用者都懂得搭建页面的数据格式、数据的规律和实现原理。
**我们的运营搭建平台,目的就是要让非开发人员能低成本地搭建网页,不需要投入前端程序员的开发时间。**假设搭建页面直接配置数据是一个“解答题”,那么拖拽配置页面就是一个“选择题”。“解答题”是留给专业人员来做,例如前端开发程序员,“选择题”是给非专业人员使用,例如运营同事和产品同事。
因此,开发拖拽布局组件,其实就是要降低配置页面的难度,让非前端开发的人员能直接上手,使用这个配置页面的功能,用技术来解放生产力。
既然拖拽布局业务组件对运营搭建平台这么重要,如何实现呢?我们还是按老规矩,先实现一个最简单的功能案例,分析清楚原理,再来抽象逻辑,封装成组件。
如何实现简单的拖拽布局功能?
我们先从一个简单的拖拽布局功能学起。我主要用原生的JavaScript API方式来实现功能,不使用任何框架,带你掌握拖拽实现的技术原理,希望能“授你以渔”。
对于拖拽布局功能,常见的功能要求是要在一个限定范围的“容器”内,让指定的“子模块”可以拖拽移动,在拖拽过程中还需要重新对模块进行排位。
具体实现可以分成五步:
- 定义父容器和子模块;
- 监听子模块的拖拽开始事件;
- 监听拖拽过程经过父容器里哪些子模块;
- 计算和重新渲染拖拽过程的临时布局;
- 监听拖拽结束事件,更新最终模块布局。
我们一步步分析相关的操作实现。
第一步定义父容器和子模块
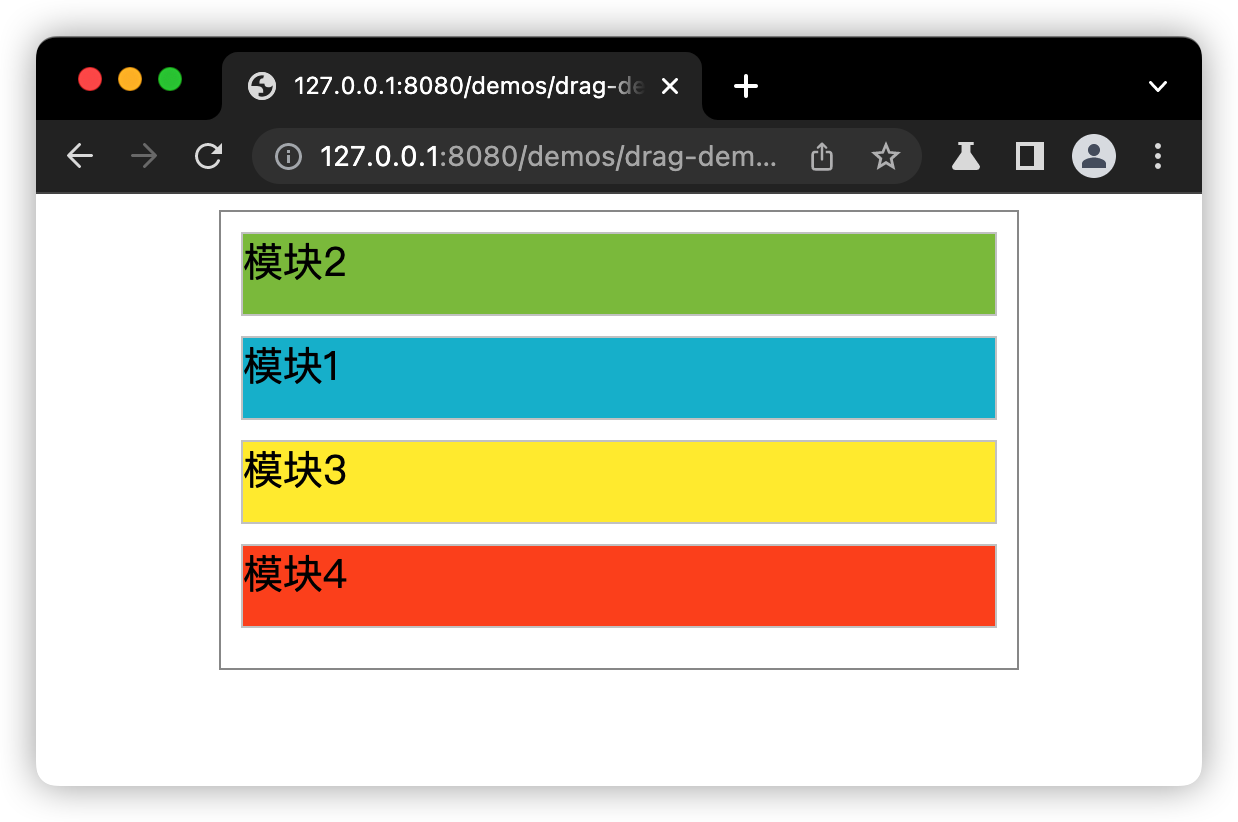
这里“父容器”就是限定拖拽范围的DOM,“子模块”就是在父容器DOM里的指定排序的 children DOM,也就是子节点。在定义子模块的DOM时,我们还要加上draggable属性,让它能够实现鼠标拖拽的视觉效果。
这里要注意一点,这个draggable属性,仅仅是让DOM在鼠标拖拽时有视觉上的移动,当鼠标释放DOM时,DOM会自动复原,不能直接实现拖拽功能。
看具体实现的HTML代码:
1
2
3
4
5
6
7
8
9
10
11
12
13
14
15
16
17
18
19
20
21
22
23
24
25
26
27
28
29
30
31
32
33
34
35
36
37
38
39
40
41
| <html>
<head>
<meta charset="utf-8" />
</head>
<style>
.drag-layout {
display: block;
width: 400px;
margin: 0 auto;
box-sizing: border-box;
padding: 10px;
border: 1px solid #999999;
}
.drag-item {
height: 40px;
border: 1px solid #cccccc;
margin-bottom: 10px;
font-size: 20px;
}
.drag-item.active {
opacity: 0.4;
}
</style>
<body>
<div class="drag-layout">
<div draggable="true" class="drag-item" style="background: #00bcd4;">
模块1
</div>
<div draggable="true" class="drag-item" style="background: #8bc34a;">
模块2
</div>
<div draggable="true" class="drag-item" style="background: #ffeb3b;">
模块3
</div>
<div draggable="true" class="drag-item" style="background: #ff5722;">
模块4
</div>
</div>
<script type="module" src="./drag-demo.js"></script>
</body>
</html>
|
效果图如下所示:
第二步监听子模块的拖拽开始事件
具体的监听方式,是以父容器的DOM作为事件代理来监听。这里,就要用到DOM的原生事件监听API addEventListener,来监听dragstart事件。
拖拽子模块时,子模块的拖拽事件会通过“事件冒泡”的方式让父容器捕获,所以我们监听父容器,就能捕获到子模块的开始拖拽事件dragstart,并且监听这个事件。
这个时候,我们需要定义一个变量,来标记当前拖拽中的子模块原始位置,给后续拖拽布局重新排序时候计算用。我通过原生的DOM API写了一个方法,可以根据子模块DOM来计算定位到父容器DOM里的位置序号。
具体代码如下所示:
1
2
3
4
5
6
7
8
9
10
11
12
13
14
15
16
17
18
19
20
21
22
23
24
25
26
27
28
29
30
31
32
33
34
35
36
37
| const dragLayout = document.querySelector('.drag-layout');
let activeIndex = -1;
let dragToIndex = -1;
let prevItems = [];
function getItemIndex(item) {
let elem = item;
let index = -1;
if (!elem || !elem.parentElement) {
return index;
}
index = 0;
elem = elem.previousElementSibling;
while (elem) {
index++;
elem = elem.previousElementSibling;
}
return index;
}
dragLayout.addEventListener('dragstart', (e) => {
const dom = e.target;
const isItem = dom.classList.contains('drag-item');
if (isItem) {
const itemDOMs = document.querySelectorAll('.drag-item');
prevItems = Array.from(itemDOMs);
const itemIndex = getItemIndex(dom);
activeIndex = itemIndex;
dom.classList.add('active');
}
});
|
第三步监听拖拽过程经过父容器里哪些子模块
这个需要监听父容器的dragover事件,基于拖拽事件,可以冒泡到父容器DOM来捕获,然后我们就可以通过dragover事件,来监听当前拖拽子组件的的鼠标位置,在哪个其它子模块的“上空”。
我们可以在事件里实时“捕获”鼠标拖拽到某个新位置下面的子模块DOM,然后通过上一步实现的查找子模块位置的方法,计算出拖拽过程中的新位置序号,这个序号也就是当前“被拖拽的子模块”可能被“释放”的新位置。
具体代码如下所示:
1
2
3
4
5
6
7
8
9
10
11
12
13
|
dragLayout.addEventListener('dragover', (e) => {
e.preventDefault();
const dom = e.target;
const isItem = dom.classList.contains('drag-item');
if (isItem) {
const overItemIndex = getItemIndex(dom);
dragToIndex = overItemIndex;
resetItems();
}
});
|
第四步计算和重新渲染拖拽过程的临时布局
前面步骤中所有的子模块DOM,是在父容器DOM里并排显示的。当“被拖拽的子模块”经过“某个其他子模块”上空时,就可以做个临时重新排序渲染,“被拖拽的子模块”从原来位置抽出来,整个子模块布局就按顺序补位,把“被拖拽的子模块”插入经过的“某个其他子模块”的位置,达到重新排序的操作。
具体实现代码如下:
1
2
3
4
5
6
7
8
9
10
11
12
13
14
15
16
17
18
19
20
21
|
function resetItems() {
if (!prevItems[activeIndex]) {
return;
}
if (dragToIndex >= 0 && dragToIndex < prevItems.length) {
const newList = prevItems.map((item) => item);
const [activeItem] = newList.splice(activeIndex, 1);
if (dragToIndex === 0) {
newList.unshift(activeItem);
} else {
newList.splice(dragToIndex, 0, activeItem);
}
Array.from(dragLayout.children).forEach((child) => {
dragLayout.removeChild(child);
});
newList.forEach((item) => {
dragLayout.appendChild(item);
});
}
}
|
代码中,我用了一个临时的子模块数组,缓存上一次未被修改的子模块排序数据,在拖拽dragover过程中,就根据上述算法来重新排序渲染。
我们已经完成拖拽布局的绝大部分功能,接下来就是收尾工作。
第五步监听拖拽结束事件,更新最终模块布局
这里,我们监听父容器DOM的dragend事件,捕获最终位置,然后通过第四步的位置布局方法重新渲染子模块DOM的顺序。具体代码实现如下:
1
2
3
4
5
6
7
8
9
|
dragLayout.addEventListener('dragend', (e) => {
e.preventDefault();
prevItems.forEach((item) => {
item.classList.remove('active');
});
dragToIndex = -1;
activeIndex = -1;
});
|
最终的功能效果如动图所示:

这五步就是一个完整的拖拽布局的原生JavaScript API实现过程。
我们还可以改一下HTML代码里的CSS样式,让这个纵向的拖拽布局变成横向的拖拽布局功能:
1
2
3
4
5
6
7
| .drag-layout.horizontal {
flex-direction: row;
display: flex;
}
.drag-layout.horizontal .drag-item {
width: 100px;
}
|
最终的功能效果如动图所示:

现在,你应该知道原生JavaScript API如何实现一个简单的拖拽布局功能了吧,那么,把这个实现思路融入到Vue.js 3.x这个框架环境里,该怎么做呢?或者说,如果要用Vue.js 3.x来封装拖拽布局的业务组件,我们应该怎么做呢?
如何用Vue3封装拖拽布局的业务组件?
通过上面的简单实现过程,我们可以知道,拖拽布局操作核心就是在“父容器”里拖拽控制“子模块”,那么,在Vue.js中,我们就可以把“父容器”和“子模块”封装成两个独立的Vue.js组件来进行组合,实现拖拽功能。
基于上面的五步,通过Vue.js的组件封装思维,我们可以精简成三步来实现:
- 第一步,封装父容器组件;
- 第二步,封装子容器组件;
- 第三步,组合父容器和子容器。
来看看每一步的具体实现细节。
**第一步,封装父容器组件。**这里主要的操作就是在父容器里直接监听dragstart、dragover和dragend事件。因为子容器会在父容器中使用,所以我们可以使用Vue3的API provide/inject,来实现父子组件里的轻量级数据通信。
具体实现,就是用provide在父容器定义好共享响应式数据,然后在子容器里用inject,来使用父容器定义的共享响应式数据。
父容器Vue.js 3.x组件代码的具体实现:
1
2
3
4
5
6
7
8
9
10
11
12
13
14
15
16
17
18
19
20
21
22
23
24
25
26
27
28
29
30
31
32
33
34
35
36
37
38
39
40
41
42
43
44
45
46
47
48
49
50
51
52
53
54
55
56
57
58
59
60
61
62
63
64
65
| <template>
<div
:className="baseClassName"
@dragstart="onDragStart"
@dragover="onDragOver"
@dragend="onDragEnd"
>
<slot></slot>
</div>
</template>
<script setup lang="ts">
import { reactive, provide, toRaw } from 'vue';
import {
DRAG_CONTEXT_KEY,
getElementIndex,
getDraggingElement
} from './common';
import { prefixName } from '../theme/index';
import type { DragContext } from './common';
const baseClassName = `${prefixName}-drag-layout`;
const emits = defineEmits<{
(event: 'dragStart', e: { activeIndex: number; dragToIndex: number }): void;
(event: 'dragOver', e: { activeIndex: number; dragToIndex: number }): void;
(event: 'dragEnd', e: { activeIndex: number; dragToIndex: number }): void;
}>();
const dragContext = reactive<DragContext>({
activeIndex: -1,
dragToIndex: -1
});
provide(DRAG_CONTEXT_KEY, dragContext);
const onDragStart = () => {
emits('dragStart', {
activeIndex: toRaw(dragContext.activeIndex),
dragToIndex: toRaw(dragContext.dragToIndex)
});
};
const onDragOver = (e: DragEvent) => {
e.preventDefault();
const target: HTMLElement | null = getDraggingElement(
e?.target as HTMLElement
);
const dragToIndex = getElementIndex(target);
dragContext.dragToIndex = dragToIndex;
emits('dragOver', {
activeIndex: toRaw(dragContext.activeIndex),
dragToIndex: toRaw(dragContext.dragToIndex)
});
};
const onDragEnd = () => {
dragContext.activeIndex = -1;
dragContext.dragToIndex = -1;
emits('dragEnd', {
activeIndex: toRaw(dragContext.activeIndex),
dragToIndex: toRaw(dragContext.dragToIndex)
});
};
</script>
|
完整代码在源码文件 packages/business/src/drag/drag-layout.vue 里。
第二步,封装子容器组件。
我们直接注册监听拖拽事件,同时,触发事件时来跟父容器进行数据通信。也就是说,当子容器触发dragstart事件时,通过inject拿到共享的响应式数据,来传递拖拽选中的组件序号位置。具体代码实现如下所示:
1
2
3
4
5
6
7
8
9
10
11
12
13
14
15
16
17
18
19
20
21
22
23
24
25
26
27
28
29
30
31
32
| <template>
<div
ref="domItem"
:className="baseClassName"
draggable="true"
data-drag-item="yes"
@dragstart="onDragItem"
>
<slot />
</div>
</template>
<script setup lang="ts">
import { ref, inject } from 'vue';
import { DRAG_CONTEXT_KEY, getElementIndex } from './common';
import { prefixName } from '../theme/index';
import type { DragContext } from './common';
const baseClassName = `${prefixName}-drag-item`;
const domItem = ref<HTMLDivElement>();
const dragContext: DragContext | undefined =
inject<DragContext>(DRAG_CONTEXT_KEY);
const onDragItem = (e: DragEvent) => {
e.stopPropagation();
const index = getElementIndex(domItem?.value || null);
if (dragContext && dragContext?.activeIndex >= -1) {
dragContext.activeIndex = index;
}
};
</script>
|
完整代码在源码文件 packages/business/src/drag/drag-item.vue 里。
第三步,组合父容器和子容器。
这是最重要的,我们要将子容器和父容器组件进行组合,同时要处理子容器里可以用插槽来实现自定义拖拽的内容。所以,这里需要一个Map,来注册有哪些自定义组件要进行拖拽,然后再加一个数组,来描述拖拽的初始位置。
最后我用了Vue.js的 <component> 组件来实现动态组件渲染,并实现了自定义渲染拖拽内容。具体代码如下所示:
1
2
3
4
5
6
7
8
9
10
11
12
13
14
15
16
17
18
19
20
21
22
23
24
25
26
27
28
29
30
31
32
33
34
35
36
37
38
39
40
41
42
43
44
45
46
47
48
49
50
51
52
53
54
55
56
57
58
59
60
61
62
63
64
65
66
67
68
69
70
71
72
73
74
75
76
77
78
79
80
81
82
83
84
85
86
87
88
89
90
91
92
| <template>
<div :class="baseClassName">
<DragLayout @dragOver="onDragOver" @dragEnd="onDragEnd">
<DragItem v-for="(item, index) in viewData.list" :key="index">
<div>{{ item.name }}</div>
<component
v-if="item?.componentName"
:is="componentMap?.[item.componentName]"
></component>
</DragItem>
</DragLayout>
</div>
</template>
<script setup lang="ts">
import { reactive, toRaw } from 'vue';
import DragLayout from './drag-layout.vue';
import DragItem from './drag-item.vue';
import { prefixName } from '../theme/index';
import type { Component } from 'vue';
import type { DragContext } from './common';
const baseClassName = `${prefixName}-drag`;
const props = defineProps<{
componentMap: { [name: string]: Component };
layoutList: { name: string; componentName: string }[];
}>();
const emits = defineEmits<{
(
event: 'change',
e: { layoutList: { name: string; componentName: string }[] }
): void;
}>();
const componentMap = toRaw(props.componentMap);
const prevContext: DragContext = {
activeIndex: -1,
dragToIndex: -1
};
const clone = (data: unknown) => {
return JSON.parse(JSON.stringify(data));
};
let layoutList: { name: string; componentName: string }[] = toRaw(
props.layoutList
);
const viewData = reactive<{
list: { name: string; componentName: string }[];
}>({
list: clone(layoutList)
});
function resetLayoutList(context: DragContext) {
const { activeIndex, dragToIndex } = context;
const tempList: { name: string; componentName: string }[] = clone(layoutList);
if (
prevContext.activeIndex === activeIndex &&
prevContext.dragToIndex === dragToIndex
) {
return;
}
if (activeIndex >= 0 && dragToIndex >= 0) {
const [target] = tempList.splice(activeIndex, 1);
if (dragToIndex === 0) {
tempList.unshift(target);
} else if (dragToIndex >= tempList.length) {
tempList.push(target);
} else {
tempList.splice(dragToIndex, 0, target);
}
viewData.list = tempList;
}
prevContext.activeIndex = activeIndex;
prevContext.dragToIndex = dragToIndex;
}
const onDragOver = (ctx: DragContext) => {
resetLayoutList(ctx);
};
const onDragEnd = () => {
layoutList = toRaw(viewData.list);
emits('change', { layoutList });
};
</script>
|
完整代码在源码文件 packages/business/src/drag/drag.vue 里。
当我们基于Vue3实现了拖拽功能组件代码后,可以这么使用:
1
2
3
4
5
6
7
8
9
10
11
12
13
14
15
16
17
18
19
20
21
22
23
24
25
26
27
28
29
30
31
32
33
34
35
36
37
38
39
40
41
42
| <template>
<div>
<Drag
:componentMap="componentMap"
:layoutList="layoutList"
@change="onChange"
></Drag>
</div>
</template>
<script setup lang="ts">
import { Drag } from '../src/index';
import Mod1 from './modules/mod-1.vue';
import Mod2 from './modules/mod-2.vue';
import Mod3 from './modules/mod-3.vue';
const componentMap = {
Mod1: Mod1,
Mod2: Mod2,
Mod3: Mod3
};
const layoutList = [
{
name: '组件001',
componentName: 'Mod1'
},
{
name: '组件002',
componentName: 'Mod2'
},
{
name: '组件003',
componentName: 'Mod3'
}
];
const onChange = (e: unknown) => {
console.log('onChange ===', e);
};
</script>
|
具体效果如图所示:

现在,我们基于Vue.js 3.x正式实现了拖拽布局组件。
如何优雅扩展拖拽布局组件的业务能力?
在实际的业务项目中,业务方可能会随时随地修改功能的业务需求,所以,做这类拖拽组件,我们可能会有随时快速定制的要求,例如需要拖拽布局组件可以自定义横向和纵向的布局操作等。那如何优雅扩展拖拽布局组件的业务能力呢?
我们可以基于上述封装Vue3组件,对组件的Props进行调整和修改。
我们可以添加一个horizontal的Prop,来控制整个拖拽功能的布局方向CSS样式,具体就是根据这个horizontal变量来判断是否要加上对应的className。而且,还要改造一下父容器布局的CSS样式,也就是 drag-layout.vue的代码。
修改如下所示:
1
2
3
4
5
6
7
8
9
10
11
12
13
14
15
16
17
18
19
20
| <template>
<div
:class="{ [baseClassName]: true, ['is-horizontal']: props.horizontal }"
@dragstart="onDragStart"
@dragover="onDragOver"
@dragend="onDragEnd"
>
<slot></slot>
</div>
</template>
<script setup lang="ts">
const props = defineProps<{ horizontal?: boolean }>();
</script>
|
添加布局样式:
1
2
3
4
5
6
7
8
|
.@{prefix-name}-drag-layout {
&.is-horizontal {
flex-direction: row;
}
}
|
实现效果如动图所示:

总之,如果后续业务方要对业务组件的功能进行修改或者定制,你可以封装成对应的Vue3组件的Props API进行控制,尽可能用最小的代码修改量,对组件的功能进行调整。
总结
现在,你应该对拖拽布局组件的实现有清晰的认识了。拖拽布局组件的功能很难界定,业务需求也变化多端,所以我们把它定位成业务组件。
基于原生JavaScript API来实现拖拽布局功能,核心就是要定义“父容器”来承载和限制拖拽的范围,定义“子容器”来控制拖拽操作。父、子容器拖拽交互和子容器重新排序,主要是要记录每次“被拖拽”和“拖拽到”两个容器位置的序号数据,再通过这两个数据,换算出重新排序的位置,最后达到排序重新渲染。
基于原生JavaScript API实现的步骤,我们再通过Vue.js 3.x的API重新实现了一遍。如果你真的充分理解了原生JavaScript API和Vue.js 3.x实现步骤,即使换成React.js,你也完全可以实现出类似的拖拽功能,这也是我前面说的“授人以渔”。
最后,业务需求都是千变万化,在实现业务组件时候,你要时刻做好用优雅的改造方式对原有组件做功能调整和改造的准备。
思考题
我们实现了拖拽布局组件,只是通过拖拽调整了布局,那么,如果要从一个布局拖拽到另外一个布局里,应该怎么实现这个“拖放”布局组件呢?
期待你的留言,和我和其他同学一起讨论。下节课见。